
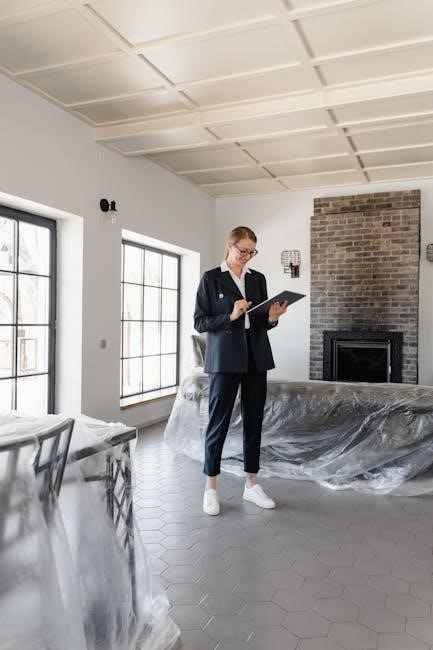
A pre-drywall inspection is a critical phase in construction, ensuring all systems like electrical, plumbing, and framing are correctly installed before drywall conceals them. Using a checklist streamlines the process, helping identify hidden issues early to prevent costly repairs later. This step ensures structural integrity and proper functionality, safeguarding your investment and ensuring a smooth construction process.
Why a Pre-Drywall Inspection is Crucial
A pre-drywall inspection is essential to identify and address potential issues before they become costly or difficult to repair. It ensures that electrical, plumbing, and HVAC systems are correctly installed and functioning properly. This step verifies that the foundation and framing are structurally sound, preventing future safety hazards. Early detection of problems saves time and money, ensuring compliance with building codes and providing peace of mind for homeowners. It’s a proactive approach to guaranteeing the quality and safety of the construction.
Benefits of Using a Pre-Drywall Inspection Checklist
A pre-drywall inspection checklist serves as a valuable tool for ensuring thoroughness and consistency. It helps organize the inspection process, guaranteeing that no critical areas are overlooked. The checklist allows for the verification of electrical, plumbing, and HVAC systems, as well as foundation and framing integrity. By identifying potential issues early, it prevents costly repairs and delays. Customizable to specific projects, the checklist ensures compliance with standards and provides a clear guide for inspectors, contractors, and homeowners alike.

Foundation and Framing Inspection
A pre-drywall inspection ensures the foundation and framing are structurally sound. Check for cracks, unevenness, and proper alignment to guarantee safety and long-term stability.
Checking for Cracks and Unevenness in the Foundation
During a pre-drywall inspection, thoroughly inspect the foundation for cracks, unevenness, or signs of shifting. Use a level to ensure surfaces are even and check for water damage or stains. Look for any gaps or misalignments in the foundation walls or slab. Addressing these issues early prevents costly repairs and ensures a stable structure for the entire building.
Ensuring Proper Framing Alignment and Structural Integrity
During the pre-drywall inspection, verify that the framing is properly aligned and structurally sound. Check load-bearing walls and beams for correct installation and secure fastening. Ensure studs are straight, evenly spaced, and plumb. Look for any gaps or misalignments in joints or connections. Proper framing alignment is crucial for supporting the building’s weight and ensuring safety. Use a level and inspection tools to confirm all components are secure and properly positioned before drywall installation begins.
Electrical System Review
An electrical system review ensures wiring, outlets, and circuit breakers are correctly installed and meet safety standards. Verify connections, GFCI protection, and proper panel setup to prevent future issues.
Verifying Electrical Wiring and Outlet Placement
Ensure all electrical wiring is properly installed, secure, and meets local codes. Check for correct outlet placement, GFCI protection in wet areas, and sufficient receptacle density. Verify wiring connections to panels, switches, and outlets are tight and labeled correctly. Inspect for any visible damage, such as frayed wires or improperly spliced connections. Confirm outlets are spaced appropriately to avoid overcrowding and ensure safety. This step prevents electrical hazards and ensures reliable system performance.
Inspecting Circuit Breakers and Panels
Inspect the main electrical panel and circuit breakers to ensure proper installation and secure connections. Verify that all components are correctly labeled and meet local electrical codes. Check for adequate capacity to handle the home’s electrical demands. Ensure there are no signs of damage, overheating, or wear on breakers or wiring. Test circuit functionality to confirm proper operation. This step ensures the electrical system operates safely and efficiently, preventing future hazards or outages.
Plumbing System Evaluation
Inspect plumbing for leaks, proper pipe installation, and fixture connections. Verify water heater placement and functionality. Ensure all systems are securely connected and meet code standards.
Checking for Leaks and Proper Pipe Installation
A thorough inspection of the plumbing system involves checking for any visible leaks, water damage, or moisture around pipes and fittings. Ensure all pipes are correctly sized, properly secured, and aligned. Verify that drain lines, vent pipes, and water supply lines are installed correctly and comply with local building codes. Inspect connections to fixtures, appliances, and the water heater for tightness and proper sealing. Identifying issues early prevents costly repairs and ensures a functional plumbing system.
Inspecting Water Heater and Fixtures
During the pre-drywall inspection, examine the water heater for proper installation, venting, and connections. Ensure it is securely fastened and meets local building codes. Check all plumbing fixtures, such as faucets and valves, for correct installation and functionality. Verify that water supply lines are properly connected and leak-free. Inspect drain lines for correct slope and venting to prevent future issues. Ensure all fixtures are securely mounted and aligned correctly. This step ensures the plumbing system operates efficiently and safely after drywall installation.
HVAC System Inspection
Check HVAC ductwork installation, ensuring proper sealing and insulation. Verify HVAC unit placement, connections, and venting comply with building codes. Ensure system components are correctly installed and functioning before drywall installation begins.
Ensuring Proper Ductwork Installation
Inspect ductwork for leaks, proper sealing, and insulation. Verify ducts are correctly sized and routed according to design plans. Check connections, vents, and registers for secure fastening and proper insulation. Ensure all components align with ventilation requirements. Proper installation prevents airflow restrictions and energy inefficiency. Use a checklist to confirm compliance with HVAC standards and building codes. Addressing issues during pre-drywall inspection avoids costly repairs later, ensuring optimal system performance and efficiency.
Checking HVAC Unit Placement and Connections
Verify HVAC unit placement aligns with design specifications, ensuring adequate spacing for maintenance. Check that all ducts, electrical connections, and refrigerant lines are securely fastened and sealed. Confirm the unit is level and properly anchored to prevent vibration. Inspect ventilation openings for proper airflow and ensure drain pans are correctly installed. Addressing these details ensures efficient system operation, prevents moisture issues, and avoids future repairs. A thorough checklist review guarantees compliance with HVAC standards and optimal performance.
Insulation and Firestop Inspection
Inspect insulation for proper coverage, thickness, and quality, ensuring no gaps or damage. Verify firestops are correctly installed at penetrations to maintain fire-resistance ratings and safety standards.
Verifying Insulation Coverage and Quality
Ensure insulation is properly installed, with full coverage in walls, floors, and ceilings. Check for consistent thickness and no gaps or damage. Verify materials meet specifications and are free from compression or misalignment. Inspect for proper sealing at joints and edges to prevent air leaks. Confirm insulation meets local building codes and energy efficiency standards. Look for any signs of moisture or mold, which could compromise insulation performance. Proper installation ensures energy efficiency and long-term structural integrity.
Ensuring Firestops are Properly Installed
Firestops must be inspected to prevent fire spread through walls, floors, and penetrations. Verify firestop materials are correctly installed around pipes, ducts, and cables. Ensure all gaps are sealed with approved products and meet fire-resistance ratings. Check for proper compression and alignment of firestop materials. Confirm compliance with local fire codes and specifications. Look for any signs of damage or improper installation, which could compromise fire safety. Properly installed firestops are essential for maintaining structural integrity and safety in case of emergencies.
Fasteners and Joint Inspection
Inspect fasteners for proper placement, tightness, and alignment. Check joints for gaps or misalignment. Ensure all connections are secure and meet building code requirements.
Checking for Proper Fastener Placement
Ensure all fasteners are correctly positioned, tightly secured, and evenly spaced. Verify that screws, nails, and bolts are appropriately sized for their applications. Check for proper alignment and tightness to prevent structural issues. Ensure no fasteners are over-tightened, which could cause damage. Confirm that all connections meet local building codes and standards. Look for any gaps or misalignments that could compromise integrity. Proper fastener placement is essential for maintaining structural stability and safety.
Inspecting Seams and Joints for Integrity
Examine all seams and joints in walls, floors, and ceilings for proper sealing and alignment. Check for gaps, uneven surfaces, or misaligned connections that could compromise structural integrity. Ensure all joints are securely fastened with appropriate materials like tape, compound, or screws. Look for signs of weakness, such as cracks or loose fasteners, which may indicate poor workmanship. Verify that all seams are flush and evenly spaced to maintain stability and prevent future issues. Address any defects promptly to ensure long-term durability.
Scheduling and Tools for Inspection
Schedule the inspection before drywall installation begins. Use a checklist, flashlight, measuring tape, and camera to ensure thoroughness. Proper timing and tools are key to efficiency.
Best Time to Conduct the Inspection
The best time to conduct a pre-drywall inspection is after framing, electrical, plumbing, and HVAC installations are complete but before drywall installation begins. This allows for a thorough review of all systems without obstruction. Use a detailed checklist to ensure no component is overlooked. Timing is critical, as early detection of issues prevents costly repairs later. Proper scheduling ensures structural integrity and system functionality are verified before final construction phases commence.
Essential Tools for a Thorough Inspection
A thorough pre-drywall inspection requires specific tools to ensure accuracy and completeness. A flashlight helps illuminate dark areas, while a measuring tape and level verify alignment and structural integrity. A checklist ensures no component is overlooked. Additional tools like a screwdriver, camera, and moisture meter can aid in inspecting electrical systems, documenting findings, and detecting potential leaks. Safety gear, such as a hard hat and gloves, is also crucial for navigating construction sites safely and efficiently during the inspection process.
Using a Pre-Drywall Inspection Checklist
A pre-drywall inspection checklist streamlines the process, ensuring all critical components are reviewed. It helps identify potential issues early, preventing costly repairs later. This guide ensures compliance with industry standards and serves as a valuable tool for contractors and homeowners alike.
Downloading a Comprehensive Checklist Template
Downloading a pre-drywall inspection checklist template provides a structured approach to evaluating construction progress. These templates are widely available online and can be customized to suit specific project needs. They cover key areas such as foundation integrity, electrical wiring, plumbing systems, and insulation quality. By using a detailed checklist, inspectors can ensure no critical components are overlooked, saving time and preventing future issues. This resource is invaluable for contractors, inspectors, and homeowners aiming for a thorough and efficient review.
Customizing the Checklist for Specific Projects
Customizing a pre-drywall inspection checklist ensures it aligns with the unique requirements of your project. Start with a comprehensive template and tailor it by adding or removing sections based on the scope of work. Include project-specific details such as local building codes, unique materials, or specialized systems. This customization helps focus the inspection on critical areas, ensuring no detail is overlooked. Collaboration with contractors and clients can further refine the checklist, making it a precise tool for your construction needs.
Frequently Asked Questions
Common questions include whether a pre-drywall inspection is necessary, what it covers, and if hiring an independent inspector is worth the investment. These inquiries highlight its importance.
What to Ask During the Pre-Drywall Inspection
- Are all electrical outlets properly installed and spaced according to code?
- Is the plumbing system fully leak-free and correctly routed?
- Are HVAC ducts properly sealed and insulated?
- Is the foundation free of cracks or structural issues?
- Are all seams and joints in the framing secure and properly aligned?
- Is the insulation adequately covering all necessary areas?
- Have firestops been correctly installed to prevent fire hazards?
- Are fasteners placed correctly and evenly throughout the structure?
Should You Hire an Independent Inspector?
Hiring an independent inspector for a pre-drywall inspection can provide an unbiased assessment of the construction quality. They bring specialized expertise, ensuring all systems meet industry standards. While contractors may conduct their own inspections, an independent inspector can catch overlooked issues, potentially saving thousands in future repairs. For homeowners, this adds an extra layer of assurance, verifying that electrical, plumbing, and structural elements are correctly installed. It’s a wise investment for peace of mind and long-term safety.